Not that anyone's really reading this, but....
I fail at the whole "keeping a blog" thing. I really do. I don't have any pictures, but I do have a few updates and a new batch!
The prickly pear is coming along VERY nicely. It didn't actually go all the way to dryness, thanks to using the Montrachet yeast which only has about a 13-14% ABV tolerance, so fermentation stopped when there was a still a decent amount of sugar left. It's sweet, but very drinkable! And getting FAR darker now that the yeast is falling out. Not quite a red wine, but not a blush or a rose. Just.... prickly pear. This one won't need any backsweetening at all, and probably won't need too much bottle aging, either.
Speaking of bottles.... yeah. So... stabilize your wine before backsweetening. I didn't. I have 7 bottles of delighful peach banana sweet wine......... soaked in to my carpet thanks to the corks popping. It is sad, and I need a carpet cleaner, now. So from now on, potassium sorbate it is!
As for the new batch, I wanted to try mead. Mead is, essentially, wine but made with honey instead of sugar. A true mead is JUST honey and water, where the addition of fruits or spices changes the name. A pyment is a mead made with grapes. A cyser is made with apples. Melomel is witih fruit other than grapes or apple. Metheglin is spiced. Hippocras is a pyment (made with grapes) and spiced.
And tons tons more.
I decided I wanted to try an "apple pie" mead, as that seemed to be a pretty common one to try on, and I hadn't made anything with apples yet so far. While researching, I found this recipe on a deviantart page:
http://emptysamurai.deviantart.com/art/Honningbrew-mead-recipe-281711080
And I just had to. It's Skyrim!! But... there were a few issues right off the bat:
1) I do 3 gallon batches, not 5. This made the amount of honey and juice a bit.. awkward.
2) No way to get fireweed honey here in Georgia, and the only other honeys were rather bland.
3) There's more than just cinnamon in an apple pie.
4) The recipe would make a rather low(er) alcohol mead than I wanted.
So I changed things up to fit my needs. This is what I ended up going with:
9lbs wildflower honey
2 1/2 gallons apple juice
10-15 cinnamon sticks
10-15 whole nutmeg
small handful whole cloves
1 1/2 tsp yeast energizer
3 tsp yeast nutrient
Lalvin EC-1118 yeast
Also unlike most mead recipes, I did my fermentation like a normal wine fermentation. Getting things started in the primary, and then transferring to a secondary after the violent fementation has subsided.
First I added the honey and apple juice in small quantities, alternating honey, then juice, stopping to stir and get the honey all incorporated. I Also would pour some of the juice into the "empty" honey containers and shake violently to try and get as much honey out as possible. The 2 1/2 gallons wasn't really decided on until I took specific gravity measurements and saw how large a volume I was getting after then 9 lbs of honey was added. That put me a bit over 3 gallons, and a starting specific gravity of 1.13. If it went to dryness, the ABV would be 17.7%. Within range of the yeast I was using.
Initially I only added 5 cinnamon sticks, as mine are old, and the original recipe didn't call for a lot. I also added 5 whole nutmeg as that goes in an apple pie. Sprinkle the yeast over the must, leave it for a night to get going, and then stir once a day vigorously for a few days until the main fermentation is over (3-4 days). I then put it in my secondary and watched the airlock bubble massively for a while.
And I mean for a LONG while. It was STILL actively fermenting a month later! I racked it, tasted, and...... was not impressed. Strong, yes (SG was about 1.012 now) but very very little spice taste, not a lot of apple, and just the barest hint of honey. It was mainly yeast and alcohol. I decided to add more cinnamon, nutmeg, and then some cloves because I just can't resist cloves in anything. And then hope for the best.
It continued to ferment for another two weeks. I was wondering if it was ever going to STOP! Then one day it did. And I noticed it started to look oddly clear in the top inch or so. Over the next 24-48 hours, the yeast just.... sank. All at once. You could almost watch it clear on its own. It was magical.
I decided it was clear enough to try and get a reading and take a taste. The yeast had petered out around 1.008 or near 16.5% ABV. And the taste.... my word the taste. Strong as ever and will put hair on your chest, but the spices come through wonderfully, and without the sour yeast flavor, the apple and honey are very present as well! Honestly, it's one of the best tasting things I've made thus far, and this includes the prickly pear AND the backsweetened peach banana!
I couldn't wait 2 more weeks to get it off those dead yeast and away from those spices. The yeast by this time were all at the bottom, but they were covering a good 3 inches all over the bottom of my carboy, which would be impossible to siphon up and away from them. I decided to try gravity filtration with some 5-10µM (5-10 micron) filter pads I'd.... um... liberated from work.
That... did not go so well. It took WAY too long to get even the nearly yeast free mead through. I gave it up and just poured it all into a new carboy, and disposed of the spices. At least half of my plan worked. I then watched the yeast sink again, leaving deliciously clear mead up top, but SO MUCH YEAST on the bottom. I decided to try a different tactic.
I siphoned off as much as I could that was relatively clear. I couldn't avoid ALL the yeast, but it was pretty good. I'd say barely more than a "normal" first racking. I then fiunneled the rest of the yeast concentrated mead into a smaller 1 gallon container. This left me with about a half gallon of very very murky yeasty mead.
Boyfriend had bought some smaller funnels when needing a TINY one for a hobby of his, so I grabbed the largest one there, and it just so happened to PERFECTLY fit on top of one of my huge plastic cups! Grab some filter paper, make an inverted cone, and I have a filter funnel! As I only had about a half gallon of liquid this time, I could take my time. And boy did it ever. It took 5 days to filter out that 1/2 gallon of liquid. One. Drip. At. A. Time. But it did eventually filter! After using about 5 pieces of filter paper, too as it would get clogged with the yeast very quickly. But I ended up with probably over a quart of mead filtered out. It didn't get rid of ALL the yeast, as yeast can go smaller than 5 microns, but it got rid of a LOT of them.
I'm getting a "spare" paycheck in May, and I've already decided to get a wine filter pump. You can filter your wine through a 1 micron filter as long as you've racked it at least once, but twice is better. If I can bottle wines within 4 months of starting, I can make more wine more often, and not have to keep my carboys occupied!
Here's hoping that by my birthday (mid June) I can sit down with a glass of Honningbrew Mead!
Tuesday, April 8, 2014

Sunday, January 5, 2014
Well crap...... oooooh what's this?
So, the pumpkin didn't happen. I think the sugar was WAY too high, and the temp just wasn't happening. Also I could have over sulphered it as I added 3 Campden tablets, and that could have made the yeast die. I tried three times to get a good fermentation going, but in the end, I have 4-5 gallons of pumpkin spice sugar water. Sad.
The blackberry and peach banana took a HUGE bound towards mellowing with this last racking. They are fast losing the new wine yeasty bite and becoming much more flavorful. Neither are to my taste personally as I don't like dry wines, but boyfriend is loving them. I think he's re-thinking this whole "giving all the wine away" idea of mine. :-p
So with the pumpkin spice being a bust, I wanted to get another started ASAP. I'd done a red and a white, so I wanted to do something red again, or at least reddish. This is an issue as it's January here in Georgia and NOTHING IS IN SEASON. The closest is cranberries and those are still hugely expensive. Also pomegranates which are great, but I'd need 45 of them to make a batch, and at $2.50/fruit..... that ain't happening. I was ready to settle on using dried fruit to get something going, so with that in mind, I went to my farmer's market to see what was there. They also have a seriously amazing selection of dried fruits, so if I couldn't find anything fresh, I'd pick up something there. Prunes if I had to.
I didn't have to. Whew.
I was walking in between the mangoes and papayas, lamenting that they would make superb WHITE wines (and were around $0.75/lb or less), I passed a small display. Just one box. I stopped. Backed up. Stared. Looked up a recipe to see how much I'd need. And then started to grin and almost started to laugh.
And then I shoveled 17-18lbs of them in to my cart.
I had found PRICKLY PEARS!
To those who live in an area where cacti are common, you're probably grinning and going "Oh man! I bet that's going to be good! I remember when my mom/gran/great gran/friend's aunt/school teacher and I made prickly pear jelly and it was amazing!" To those who don't live in an area populated by cacti, you're probably going "What the hell is a prickly pear?" or maybe you've heard of them but are going "You're going to do WHAT with a cactus?!"
Prickly pears are the fruit of a very common cactus, and are a real pain to get in the wild. Not because they're rare, or because they're hard to grow, but because, well, they're cacti. They have spines. That hurt. A lot. Harvesting usually involves long sleeves, jeans, thick gardening gloves, and tongs.
And then you need a flamethrower when you get home to burn off the spines.
Luckily, the ones I found had been completely de-spined, so I was happy to pay the $1.85/lb or so for them. They also weren't completely ripe, but the fruit inside the pod was the appropriate color, texture, flavor, and smell. So PRICKLY PEAR WINE!!
For the uninitiated, this is a prickly pear:
 It is vaguely pear shaped. It has spines. Hence, prickly pear. It really doesn't taste anything like a pear at all, so don't expect to bite in to one of these. To get to the fruit, you first shock them by pouring boiling water on them and letting them sit in it for about 2 minutes. This loosens the skin and makes them pretty simple to peel. First you cut the top and bottom off, and then do a vertical slit from one pole to the other:
 Get a thumb in there and just peel back the thick skin!
 If you're doing this from fresh picked ones, instead of ones found in a farmer's market, you'll want to have gloves on. Even with the flamethrower, they can retain some fine spines, and those suckers HURT!
Take the fruit from the skin, and discard the skin. Then use the fruit as you so wish! Some people make jelly, some juice them, some like them completely whole. They're really really full of seeds, but the seeds are edible as well, so you can eat them whole. The flavor is......... unique. I've heard it described like a combination watermelon and raspberry. It's subtle like a watermelon, but has a tang and a tartness like a raspberry. It's just...... prickly pear.
They're also violently pink. And I mean violently:
 Boyfriend said that nothing on this planet should be that color and be safe to eat. They also can be a bit slimey, which is why most people boil them when they use them for anything other than raw cooking. Some people juice them for wine or jelly making. Some ferment as is. I was following Jack Keller's Prickly Pear Wine recipe, which says to slice and boil the fruit for 15 minutes, and then let them steep and cool until lukewarm. All the fruit did fit in to one pot:
 Some of the fruit were "green cactus fruit" instead of "red cactus fruit". Probably same genus but different species. Or same species but different sub species. Or just less than 100% ripe ones. These smelled a lot like honeydew.
While all the fruit fit in there, the 1 1/2 gallons of water did not, so I had to sepearate them in to smaller pots to get them all to boil together. This leeched nearly ALL the bright pink color out of them. When relatively cool, I poured all pots into my nylon mesh bag lined primary, and then worked and squeezed like hell to get as much juice out as possible. This got me to about 2 gallons, well short of my 3 gallon batch! I knew the sugar would add some volume, so I added that next.
I realized I'd never shown the sugar, and that I probably should. Yes, everyone knows what sugar looks like, but it's a bit unreal to have to face the quantities used, and realize that it's ALL going to go away to make alcohol. Here is my measuring cup with a bit over 2 lbs of sugar in it:
 In all, I added about 7 1/2 lbs of sugar total. So take that picture, and make it x4. It seems like that it would make things insanely sweet and I'd get near molasses out, but all the sugar happily dissolved quickly, and added about another half gallon to my volume. I then added another quart or so of water to bring the total volume up to just over 3 gallons.
And then I remembered to take my specific gravity! With no fruit pulp, nylon mesh, or the like in the way, I could get a nice clear reading.
Starting SG: 1.122.
If that ferments to dryness, it'll give me an alcohol by volume (ABV) of a bit over 16%. Not bad, though I don't think the yeast I chose will get it that high. I chose the Red Star Montrachet yeast for this one, as it's the most popular one for reds where you want to retain the character of the fruit, as well as the color. This is the same yeast I used for the blackberry, so I knew what to look for in terms of activity:
 Jack's recipe is pretty simple. Peel fruit. Chop fruit. Boil fruit. Strain fruit. Add sugar, acid blend, nutrient and yeast. Let go for a while. So that's what I'm doing. I didn't make a starter culture, but instead just sprinkled the yeast on top. That's seemed to work well for others:
 You can see that the juice retained its pink hue. I have a feeling this will make closer to a rose than a deep merlot, but as long as it retains the color, I'm excited.
The orange is from the pumpkin. It permanently stained my bucket, but I cleaned the heck out of it, so there should be NO contamination (taste or otherwise) from it.
And then I went to bed, as it was nearly 1am at this point. I was nervous as Jack said this yeast really only tolerates sugar up to 23 Brix, which is at a SG of about 1.100, so a goodly bit less than what mine ended up at, but when I uncovered it this morning, there was a happy cap of foam on top and some very busy yeast underneath! I stirred it and recovered and went away happy.
This evening, I uncovered to see how it was doing (I'm always antsy at this stage), and found this gorgeous sight:
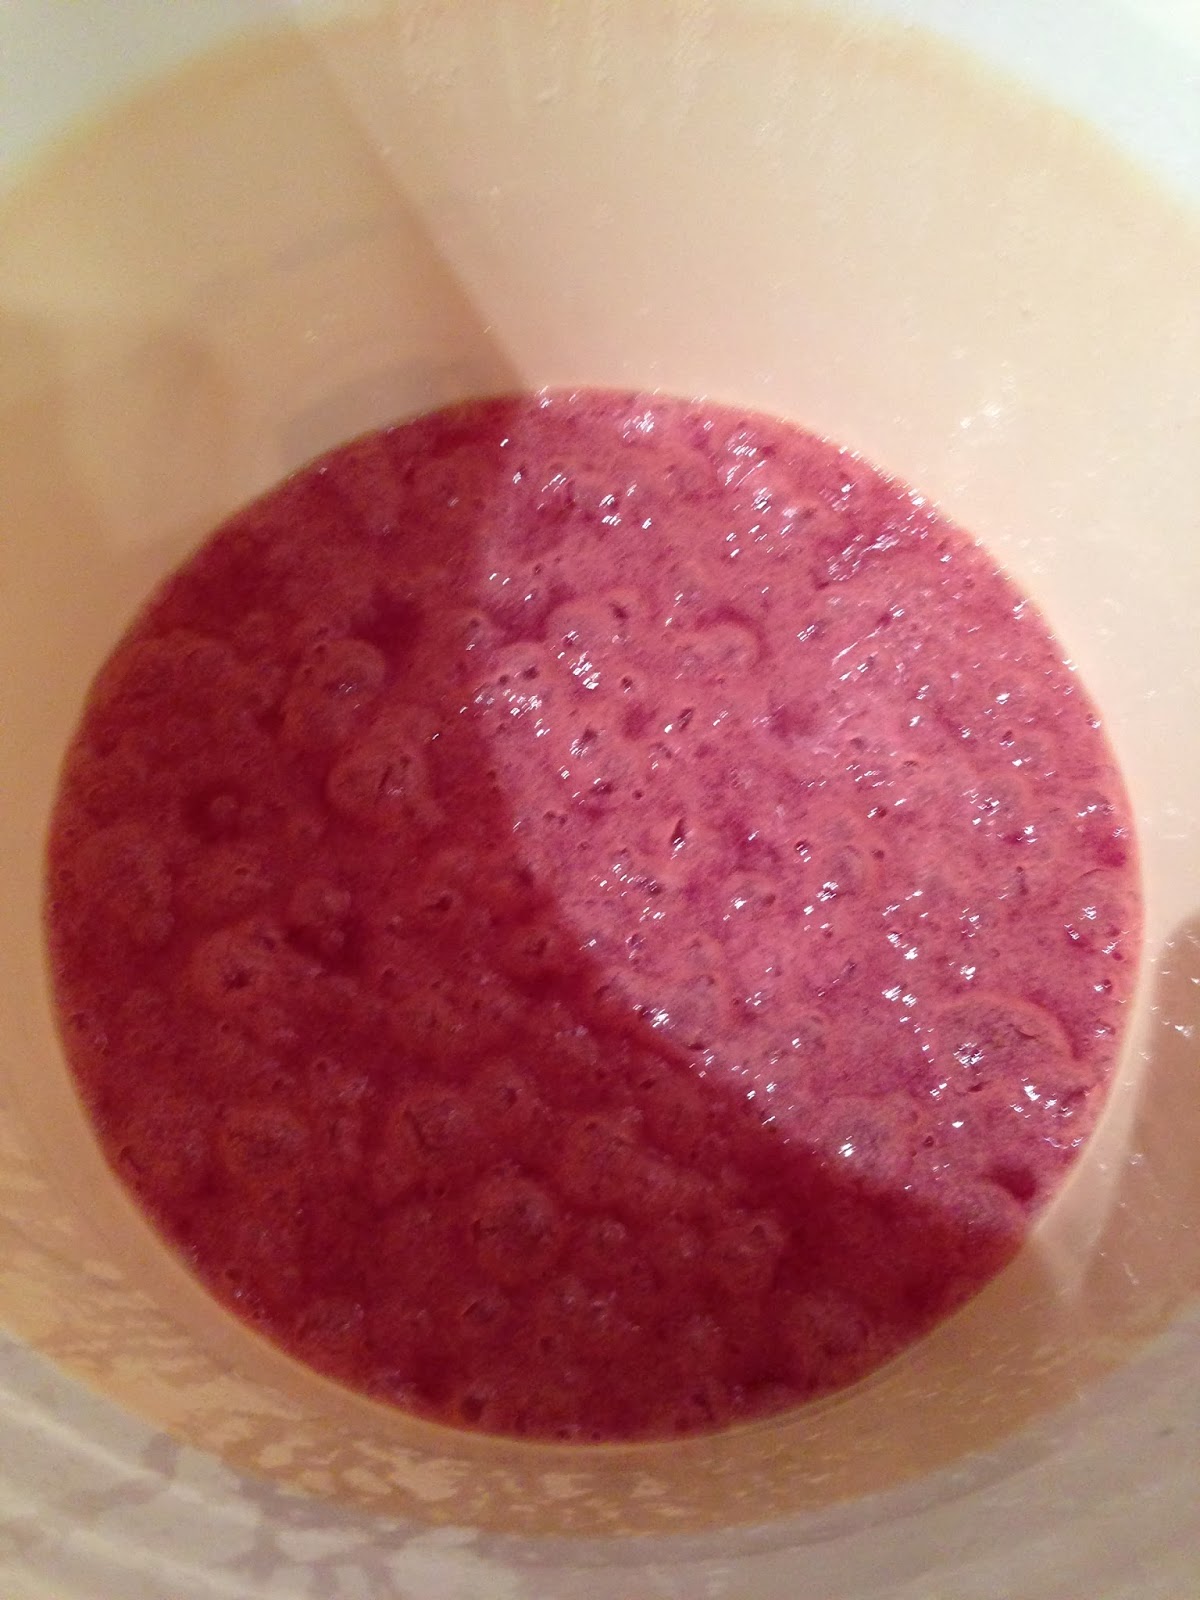 And that's where we are right now. I haven't taken another SG reading yet, but I will in the next few days. As it's FAR colder now than it was when I did the blackberry, I have the primary sitting on a heating pad to keep it off the cold tile, and to keep some heat on it. My downstairs gets to around 60F, even though the upstairs is at 71F. So far, it seems to be working!
I can't wait to taste this.I haven't had prickly pear anything in YEARS, and to find some, and make wine from them, here in Georgia has me quite giddy! :-p
The blackberry and peach banana took a HUGE bound towards mellowing with this last racking. They are fast losing the new wine yeasty bite and becoming much more flavorful. Neither are to my taste personally as I don't like dry wines, but boyfriend is loving them. I think he's re-thinking this whole "giving all the wine away" idea of mine. :-p
So with the pumpkin spice being a bust, I wanted to get another started ASAP. I'd done a red and a white, so I wanted to do something red again, or at least reddish. This is an issue as it's January here in Georgia and NOTHING IS IN SEASON. The closest is cranberries and those are still hugely expensive. Also pomegranates which are great, but I'd need 45 of them to make a batch, and at $2.50/fruit..... that ain't happening. I was ready to settle on using dried fruit to get something going, so with that in mind, I went to my farmer's market to see what was there. They also have a seriously amazing selection of dried fruits, so if I couldn't find anything fresh, I'd pick up something there. Prunes if I had to.
I didn't have to. Whew.
I was walking in between the mangoes and papayas, lamenting that they would make superb WHITE wines (and were around $0.75/lb or less), I passed a small display. Just one box. I stopped. Backed up. Stared. Looked up a recipe to see how much I'd need. And then started to grin and almost started to laugh.
And then I shoveled 17-18lbs of them in to my cart.
I had found PRICKLY PEARS!
To those who live in an area where cacti are common, you're probably grinning and going "Oh man! I bet that's going to be good! I remember when my mom/gran/great gran/friend's aunt/school teacher and I made prickly pear jelly and it was amazing!" To those who don't live in an area populated by cacti, you're probably going "What the hell is a prickly pear?" or maybe you've heard of them but are going "You're going to do WHAT with a cactus?!"
Prickly pears are the fruit of a very common cactus, and are a real pain to get in the wild. Not because they're rare, or because they're hard to grow, but because, well, they're cacti. They have spines. That hurt. A lot. Harvesting usually involves long sleeves, jeans, thick gardening gloves, and tongs.
And then you need a flamethrower when you get home to burn off the spines.
Luckily, the ones I found had been completely de-spined, so I was happy to pay the $1.85/lb or so for them. They also weren't completely ripe, but the fruit inside the pod was the appropriate color, texture, flavor, and smell. So PRICKLY PEAR WINE!!
For the uninitiated, this is a prickly pear:
Take the fruit from the skin, and discard the skin. Then use the fruit as you so wish! Some people make jelly, some juice them, some like them completely whole. They're really really full of seeds, but the seeds are edible as well, so you can eat them whole. The flavor is......... unique. I've heard it described like a combination watermelon and raspberry. It's subtle like a watermelon, but has a tang and a tartness like a raspberry. It's just...... prickly pear.
They're also violently pink. And I mean violently:
While all the fruit fit in there, the 1 1/2 gallons of water did not, so I had to sepearate them in to smaller pots to get them all to boil together. This leeched nearly ALL the bright pink color out of them. When relatively cool, I poured all pots into my nylon mesh bag lined primary, and then worked and squeezed like hell to get as much juice out as possible. This got me to about 2 gallons, well short of my 3 gallon batch! I knew the sugar would add some volume, so I added that next.
I realized I'd never shown the sugar, and that I probably should. Yes, everyone knows what sugar looks like, but it's a bit unreal to have to face the quantities used, and realize that it's ALL going to go away to make alcohol. Here is my measuring cup with a bit over 2 lbs of sugar in it:
And then I remembered to take my specific gravity! With no fruit pulp, nylon mesh, or the like in the way, I could get a nice clear reading.
Starting SG: 1.122.
If that ferments to dryness, it'll give me an alcohol by volume (ABV) of a bit over 16%. Not bad, though I don't think the yeast I chose will get it that high. I chose the Red Star Montrachet yeast for this one, as it's the most popular one for reds where you want to retain the character of the fruit, as well as the color. This is the same yeast I used for the blackberry, so I knew what to look for in terms of activity:
The orange is from the pumpkin. It permanently stained my bucket, but I cleaned the heck out of it, so there should be NO contamination (taste or otherwise) from it.
And then I went to bed, as it was nearly 1am at this point. I was nervous as Jack said this yeast really only tolerates sugar up to 23 Brix, which is at a SG of about 1.100, so a goodly bit less than what mine ended up at, but when I uncovered it this morning, there was a happy cap of foam on top and some very busy yeast underneath! I stirred it and recovered and went away happy.
This evening, I uncovered to see how it was doing (I'm always antsy at this stage), and found this gorgeous sight:
I can't wait to taste this.I haven't had prickly pear anything in YEARS, and to find some, and make wine from them, here in Georgia has me quite giddy! :-p
Thursday, November 7, 2013
My first foray into troubleshooting...
So... there was no fermentation at all in the pumpkin spice. I waited through the weekend to see if it was just slow, but nothing was changing. Wine friend suggested it was too cold, so I put my heating pad on high under it and hoped. Still nothing. As a last resort, I went back to the wine store to get another packet of yeast. This really is a complete last resort, because one packet of yeast is a LOT of yeast, and the odds of every single spore in there being dead is very very very low. But I had nothing else to try, so might as well.
While there, I ran through my issue with the guy over the counter. He asked if I'd checked the specific gravity (I had.. as much as I could with as goopy and viscous as it is), when I'd pitched it, and the like. He, too, was baffled, as that particular yeast is known for being able to handle very extreme conditions, and is often used to restart stuck fermentations where other yeasts fail. The temperature range is HUGE (down to 50F, which my house never gets that low. It stays around 70 in winter), has a high alcohol tolerance, needs few nutrients, and can handle incredibly high sugars. It should have worked!
He ended up giving me another packet for free and suggested that I just sprinkle this one on the top instead of rehydrating and activating it, as that is what he always does. It's not unknown for a whole packet of yeast to be dead, but it is rare, and he said that that's the only thing he could think of, as he knows that "[I] know what [I'm] doing". That did make me feel better, that after 3 batches, I'm considered knowledgeable and not a beginner, because I sure as hell don't feel like I'm all that experienced! Just ask Wine Friend. I pepper her with questions all the time at work!
Anyways, on Monday I got home, stirred the must (which, after sitting in pectinase for coming up on a week, is pretty gross and goopy looking), and sprinkled the yeast on top. And hoped.
Apparently I *did* get a bad pack of yeast!
Within an hour, the yeast had puffed up and started foaming a bit, which showed they were prodicuing carbon dioxide. It was such a fantastic sight! I very very gently stirred the must before going to bed, making sure to leave some yeast on the top, just in case the sudden transition to a place with very little oxygen would kill things.
The next morning, I saw a FEW bubbles popping up, but not as many as I was hoping. But at least there were some bubbles. I attributed it to the fact that the must is so damn thick that it's hard for gas to get to the surface. A vigorous stir and more came up, but still not in the amounts I was getting with my last two batches.
But... things took a turn for the better in the next few days! Every stir has been easier and less thick. More bubbles come to the surface and fizz every time, and I see more when I take off the lid, too! This morning (Thursday) it was FINALLY thin enough that I could accurately measure the specific gravity (1.100) so fermentation is DEFINITELY happening! I'm so relieved!
We will probably rack it into the secondaries tonight. I say "we" because the nylon bag is SO HEAVY with pumpkin, goop, and spices, that I can't hold it by myself and let it drain. I'm going to need Boyfriend's help with this one. Maybe later I'll have a video showing the airlock blooping away.
I've been tasting the actual liquid this whole time, and if this is what it's going to taste like, but with alcohol in it, this is going to be a seriously awesome wine and I will need to make this every year. It seriously tastes just like a pumpkin pie. Though I haven't been able to taste much alcohol in it yet. Right now, the tang is more "Not sure if alcohol, or just ginger".
I feel like a cross between a 3 year old (BUBBLES!!!) and Dr. Frankenstein (IT'S ALIIIIIIIIVE!!).
While there, I ran through my issue with the guy over the counter. He asked if I'd checked the specific gravity (I had.. as much as I could with as goopy and viscous as it is), when I'd pitched it, and the like. He, too, was baffled, as that particular yeast is known for being able to handle very extreme conditions, and is often used to restart stuck fermentations where other yeasts fail. The temperature range is HUGE (down to 50F, which my house never gets that low. It stays around 70 in winter), has a high alcohol tolerance, needs few nutrients, and can handle incredibly high sugars. It should have worked!
He ended up giving me another packet for free and suggested that I just sprinkle this one on the top instead of rehydrating and activating it, as that is what he always does. It's not unknown for a whole packet of yeast to be dead, but it is rare, and he said that that's the only thing he could think of, as he knows that "[I] know what [I'm] doing". That did make me feel better, that after 3 batches, I'm considered knowledgeable and not a beginner, because I sure as hell don't feel like I'm all that experienced! Just ask Wine Friend. I pepper her with questions all the time at work!
Anyways, on Monday I got home, stirred the must (which, after sitting in pectinase for coming up on a week, is pretty gross and goopy looking), and sprinkled the yeast on top. And hoped.
Apparently I *did* get a bad pack of yeast!
Within an hour, the yeast had puffed up and started foaming a bit, which showed they were prodicuing carbon dioxide. It was such a fantastic sight! I very very gently stirred the must before going to bed, making sure to leave some yeast on the top, just in case the sudden transition to a place with very little oxygen would kill things.
The next morning, I saw a FEW bubbles popping up, but not as many as I was hoping. But at least there were some bubbles. I attributed it to the fact that the must is so damn thick that it's hard for gas to get to the surface. A vigorous stir and more came up, but still not in the amounts I was getting with my last two batches.
But... things took a turn for the better in the next few days! Every stir has been easier and less thick. More bubbles come to the surface and fizz every time, and I see more when I take off the lid, too! This morning (Thursday) it was FINALLY thin enough that I could accurately measure the specific gravity (1.100) so fermentation is DEFINITELY happening! I'm so relieved!
We will probably rack it into the secondaries tonight. I say "we" because the nylon bag is SO HEAVY with pumpkin, goop, and spices, that I can't hold it by myself and let it drain. I'm going to need Boyfriend's help with this one. Maybe later I'll have a video showing the airlock blooping away.
I've been tasting the actual liquid this whole time, and if this is what it's going to taste like, but with alcohol in it, this is going to be a seriously awesome wine and I will need to make this every year. It seriously tastes just like a pumpkin pie. Though I haven't been able to taste much alcohol in it yet. Right now, the tang is more "Not sure if alcohol, or just ginger".
I feel like a cross between a 3 year old (BUBBLES!!!) and Dr. Frankenstein (IT'S ALIIIIIIIIVE!!).
Thursday, October 31, 2013
Updates and a new batch!
So I kind of felt that making posts that were essentially "Racked both. Still taste funny. Wine friend says they'll mellow and be good. Looking pretty!" every month would be pointless, so that's why I haven't updated. And that's my story.
But, I started a new batch! Pumpkin spice!
So, Jack Keller doesn't have a pumpkin spice recipe, but he DOES have a pumpkin recipe (Pumpkin Wine), and an apple spice recipe (Apple Spice), and so I sort of franken-recipied one for myself. I took the pumpkin wine recipe and just added spices in what I thought would be decent amounts to give it a nice pumpkin pie spicy flavor. Apples are about as light bodied as you can get, so I added more than the apple spice recipe called for. In total, for a 3 gallon batch, I added:
4 oz whole cloves
4 oz whole allspice berries
10 three inch long cinnamon sticks (my cinnamon sticks were kinda old...)
4-5 oz whole nutmeg
4-6 oz (didn't really weigh this one) fresh chopped ginger
The rest of the recipe remained the same. So, the first step was chopping and grating the pumpkins. Which, yes, if you do this, get a food processor. Do NOT try and do this by hand, even if just a 1 gallon batch. Your arm will die. Seriously.
Firstly, I used pie pumpkins, NOT jack-o-lantern pumpkins. Now if you're like my boyfriend who has only made a pumpkin pie from pumpkin in a can, you might wonder why you would never make an adorable tiny jack-o-lantern out of those adorable smooth pie pumpkins. And also, why *can't* you make a pie from the big pumpkins? And also... why are we getting 9 of them?
Going out of order, the answers are:
We're getting 9 of them because they're pretty small:

 And that's the reason you don't make jack-o-lanterns from pie pumpkins. They have very thick rinds. Also why you make edible things from them, because they have very thick rinds.
Just like any other pumpkin, scoop the seeds and fibrous stuff out. You don't have to get it completely perfectly clean, but decently so.
 Chop your pumpkin up into pieces that will fit in your food processor. How big, I will leave up to you. Note, up till now, you could still make pie out of these. I could cut this up, bake skin side down until they're soft, scrape out the flesh, and pulverize to make pumpkin goo. But that's for a later time.
Grated pumpkin looks like cheese:
 I left the skin on because I was honestly too tired and too pressed for time to cut it off. I'm glad I decided that because some of my pumpkins weren't exactly fully ripe. Unripe pie pumpkins have the consistency of a bowling ball. I had to call in help to even cut them, much less chop them up.
 On the ground because he was afraid he would crack my counters. Yes, they were that hard. We had to chop them into pieces using a huge knife, and a rolling pin to pound the knife through.
It took all 9 pumpkins to get the full 15lbs, and even that only barely.
 To this I added all the spices above. The sugar, I also followed Jack's recipe, and used 10 1/2 lbs of it. I put all of it in my largest pot and added water quart by quart until I couldn't add anymore (about 8 pints), then carefully stirred things up. Once everything was in suspension, I turned the heat on low to slowly heat it up, but not bring to a boil, as I wasn't yet ready wtih the pumpkin. Eventually, it all DID dissolve, and I was ready, so I turned up the heat. After pouring the boiling sugar water over everything, brought to a boil the rest of the water, and added it.
It looked disgusting:
 The rabbit poop things are allspice berries. I promise.
Cover and left overnight.
The next morning, I crushed 3 campden tablets, dissolved them in a tiny amount of the must, and added and stirred. This must is...... different. There's SO MUCH solid in there that it takes a good effort to stir it, but I wanted to make sure all the powder got through it.
Covered and went to work.
When I got home, I added the pectic enzyme, stirred again, and went to bed.
This morning, I added the citric acid (1 1/2 oz of it!), as well as yeast nutrient, energizer, and the yeast itself.


As you can tell, I used a different brand of yeast instead of the Red Star I had been using. This is one that Jack suggested for a high alcohol dry wine, and my wine friend uses thsi one almost exclusively. This also apparently is incredibly hardy and is used to revive stuck fermentations. The alcohol tolerance is aroudn 18%, but can go up to 20% if conditions are right.
The must didn't look much better:
 Actually, I think it looked worse. But it smells FANTASTIC!
As of now, the yeast has been in there coming up on 12 hours, and I'm starting to get worried. This is a very fast acting yeast, but has low flocculation, and low foaming. Two things that my other yeasts were very high in (especially the Montrachet!). This must is also not as watery as the others, so I don't hear or see bubbles as easily. Boyfriend is confident it's working, and I hope it is. I'll give it another stir before bed tonight.
If things go well, I'll stir it in the morning and evening tomorrow and Saturday, and depending on how it looks Saturday evening, we may be ready to rack into the secondary containers by that time. I hope so, because I don't want to leave it until Sunday night, and I really want to taste how it's coming along!
I decided to dump the overflows from both the blackberry and the peach banana as they were starting to taste off, and markedly different than the main bottles, so I now have two extra secondary containers, and one extra airlock. Win-win for me!
But, I started a new batch! Pumpkin spice!
So, Jack Keller doesn't have a pumpkin spice recipe, but he DOES have a pumpkin recipe (Pumpkin Wine), and an apple spice recipe (Apple Spice), and so I sort of franken-recipied one for myself. I took the pumpkin wine recipe and just added spices in what I thought would be decent amounts to give it a nice pumpkin pie spicy flavor. Apples are about as light bodied as you can get, so I added more than the apple spice recipe called for. In total, for a 3 gallon batch, I added:
4 oz whole cloves
4 oz whole allspice berries
10 three inch long cinnamon sticks (my cinnamon sticks were kinda old...)
4-5 oz whole nutmeg
4-6 oz (didn't really weigh this one) fresh chopped ginger
The rest of the recipe remained the same. So, the first step was chopping and grating the pumpkins. Which, yes, if you do this, get a food processor. Do NOT try and do this by hand, even if just a 1 gallon batch. Your arm will die. Seriously.
Firstly, I used pie pumpkins, NOT jack-o-lantern pumpkins. Now if you're like my boyfriend who has only made a pumpkin pie from pumpkin in a can, you might wonder why you would never make an adorable tiny jack-o-lantern out of those adorable smooth pie pumpkins. And also, why *can't* you make a pie from the big pumpkins? And also... why are we getting 9 of them?
Going out of order, the answers are:
We're getting 9 of them because they're pretty small:

Shown next to my food processor for comparison. This was obviously before any grating or even scooping had started, because everything is still relatively clean.
Pie pumpkins are small. And they're called "pie pumpkins" because, well, you make pie from them. Also because 1 pumpkin usually equals 1 pie. It's kinda cool that way. Anyways, to open these suckers, take a large knife (seen in the bottom left there), and slice vertically, but don't go through the stem because your knife won't go through. Start just to the side of the stem, and slice down. I try to slant it to go through the middle of the pumpkin.

Just like any other pumpkin, scoop the seeds and fibrous stuff out. You don't have to get it completely perfectly clean, but decently so.

Grated pumpkin looks like cheese:


It took all 9 pumpkins to get the full 15lbs, and even that only barely.

It looked disgusting:

Cover and left overnight.
The next morning, I crushed 3 campden tablets, dissolved them in a tiny amount of the must, and added and stirred. This must is...... different. There's SO MUCH solid in there that it takes a good effort to stir it, but I wanted to make sure all the powder got through it.
Covered and went to work.
When I got home, I added the pectic enzyme, stirred again, and went to bed.
This morning, I added the citric acid (1 1/2 oz of it!), as well as yeast nutrient, energizer, and the yeast itself.


As you can tell, I used a different brand of yeast instead of the Red Star I had been using. This is one that Jack suggested for a high alcohol dry wine, and my wine friend uses thsi one almost exclusively. This also apparently is incredibly hardy and is used to revive stuck fermentations. The alcohol tolerance is aroudn 18%, but can go up to 20% if conditions are right.
The must didn't look much better:

As of now, the yeast has been in there coming up on 12 hours, and I'm starting to get worried. This is a very fast acting yeast, but has low flocculation, and low foaming. Two things that my other yeasts were very high in (especially the Montrachet!). This must is also not as watery as the others, so I don't hear or see bubbles as easily. Boyfriend is confident it's working, and I hope it is. I'll give it another stir before bed tonight.
If things go well, I'll stir it in the morning and evening tomorrow and Saturday, and depending on how it looks Saturday evening, we may be ready to rack into the secondary containers by that time. I hope so, because I don't want to leave it until Sunday night, and I really want to taste how it's coming along!
I decided to dump the overflows from both the blackberry and the peach banana as they were starting to taste off, and markedly different than the main bottles, so I now have two extra secondary containers, and one extra airlock. Win-win for me!
Sunday, August 4, 2013
Ok so I fail on keeping up with this...
Just hush. I'm horrible at keeping a journal. This goes for online and physical ones. I'm good for about 2-3 entries and then I start petering out.
It's now late Saturday night (early Sunday morning) on August 3rd/4th. The peach banana has not only been under the airlock for coming up on a week, but I've completed all the additional sugar adding steps and the like too. Now it's just to wait for fermentation to finish, the yeast to die, and it'll get racked every 3-4 weeks.
So what happened in all that time?
Firstly, I tried to check the sugar before adding my yeast, but that didn't go over so well due to all the solids in the must. But here's my hydrometer:
 It's got a couple of different ways to show the sugar content, so it's pretty handy. And fairly cheap, too. (I think the nylon bag cost more than this did!)
That.. didn't give me a reliable reading, so we're just going on a wing and a prayer here. Ah well, it tasted good when I put it under the airlock the first time.
Next step after all the enzyme, campden tablets, citric acid, etc was to add the yeast nutrient, and the yeast itself. I opted for a different yeast than last time, hoping for a lower alcohol, sweeter white wine.
 Also this yeast was going to expire in January. Good enough! I did check with my local wine store, as well as ones online, that this will do well with peaches and for the wine I hope to get in the end. So it wasn't totally on a whim.
Unlike the blackberry, Jack suggest to simply sprinkle the dry yeast on the top of the must, instead of activating it in the warm water and doing the starter culture. So:
 Didn't look too appetizing, and I was dubious, but I don't want to get crazy here and start thinking that I know what's best. I checked in a few hours, and bubbles had started to form so at least some did survive, and when I stirred it 12 hours later, it was quite foamy and bubbly. Great sign!
Jack suggests 3-4 days of stirring twice daily. I had planned on putting it in the secondaries on Sunday night, after only 2 1/2 days. It's 75-78 degrees in my house currently, and Jack usually does his fermenting at 60-65. Things progress much faster at higher temps, as I found out with the blackberry. However, the best laid plans of mice and men and all that jazz. I went down Sunday morning to give it a stir and.............. no bubbles. None. I'll admit, I freaked out a bit. Time to go into the secondary and get the next batch of sugar in!
It.. did not look appetizing when I took the lid off:
 Firstly I squeezed the peaches as much as I possibly could to get all the juice out. There... wasn't much left:
 9lbs of peaches. That's what I got when it was all done. Wow.
I added 1 lb 10oz of sugar and mixed it quite well. Then siphoned. It looks like a banana smoothie:
 Once again I appeared to have added way more liquid than needed. Next time I'll go by the marks on the side of the bucket, and not just guessing. I had to use my 4th bottle to get the overflow, and use the airlock from the blackberry overflow for it. The blackbery overflow is now sporting a "cap" of duct tape to keep it airtight. So far it's working, I think!
Both the full bottle and the overflow went in my pantry, next to the blackberry:
 And then I sat, terrified my yeast had all died. Luckily, both airlocks started blooping madly within a few hours. Whew!
The recipe said to wait 5 days before adding the last of the sugar, but obviously with my warmer house, it was done early. Wednesday afternoon had me pouring the last of the sugar in. I added 1 lb 10 oz to the big jug and 7oz (enough for one gallon) to the smaller one. I did kind of forget about the whole "volume displacement" that happens, so I had to quickly siphon some from the big jug to the smaller so I could get all the sugar in. I had a very very long dowel that I used to stir both of the bottles to get all the carbonation out and to mix in the sugar and get the yeast suspended again.
Once again, a lot of "please don't be stuck please don't be stuck please don't be stuck" happened afterwards, but they started blooping almost immediately. As of now, they still are but not as rapidly. I guesstimate that the active rapid fermentation will come to an end within the next few days. Jack suggests to rack every 3 weeks after that, so we'll see. The blackberry is due to be racked on the 21st (or October 21st, depending on if I rack every month, or wait the 3 Jack suggests) so I might let that go a bit more, and rack these all at the same time after Labor Day.
And that's pretty much the last that this blog will get updated until then. I have no more wines planned until late October/November and sometime in December, and MAYBE February. I hope to have at least one of these bottled by then, so I don't have to keep buying more airlocks and bottles.
Whew... this is fun but I'm getting impatient! The blackberry has darkened considerably as the yeast keep falling out. It no longer looks magenta, but is approaching what most red wines look like. Maybe a little lighter. I hope it'll get that nice dark look after all is said and done!
It's now late Saturday night (early Sunday morning) on August 3rd/4th. The peach banana has not only been under the airlock for coming up on a week, but I've completed all the additional sugar adding steps and the like too. Now it's just to wait for fermentation to finish, the yeast to die, and it'll get racked every 3-4 weeks.
So what happened in all that time?
Firstly, I tried to check the sugar before adding my yeast, but that didn't go over so well due to all the solids in the must. But here's my hydrometer:

That.. didn't give me a reliable reading, so we're just going on a wing and a prayer here. Ah well, it tasted good when I put it under the airlock the first time.
Next step after all the enzyme, campden tablets, citric acid, etc was to add the yeast nutrient, and the yeast itself. I opted for a different yeast than last time, hoping for a lower alcohol, sweeter white wine.

Unlike the blackberry, Jack suggest to simply sprinkle the dry yeast on the top of the must, instead of activating it in the warm water and doing the starter culture. So:

Jack suggests 3-4 days of stirring twice daily. I had planned on putting it in the secondaries on Sunday night, after only 2 1/2 days. It's 75-78 degrees in my house currently, and Jack usually does his fermenting at 60-65. Things progress much faster at higher temps, as I found out with the blackberry. However, the best laid plans of mice and men and all that jazz. I went down Sunday morning to give it a stir and.............. no bubbles. None. I'll admit, I freaked out a bit. Time to go into the secondary and get the next batch of sugar in!
It.. did not look appetizing when I took the lid off:


I added 1 lb 10oz of sugar and mixed it quite well. Then siphoned. It looks like a banana smoothie:

Both the full bottle and the overflow went in my pantry, next to the blackberry:

The recipe said to wait 5 days before adding the last of the sugar, but obviously with my warmer house, it was done early. Wednesday afternoon had me pouring the last of the sugar in. I added 1 lb 10 oz to the big jug and 7oz (enough for one gallon) to the smaller one. I did kind of forget about the whole "volume displacement" that happens, so I had to quickly siphon some from the big jug to the smaller so I could get all the sugar in. I had a very very long dowel that I used to stir both of the bottles to get all the carbonation out and to mix in the sugar and get the yeast suspended again.
Once again, a lot of "please don't be stuck please don't be stuck please don't be stuck" happened afterwards, but they started blooping almost immediately. As of now, they still are but not as rapidly. I guesstimate that the active rapid fermentation will come to an end within the next few days. Jack suggests to rack every 3 weeks after that, so we'll see. The blackberry is due to be racked on the 21st (or October 21st, depending on if I rack every month, or wait the 3 Jack suggests) so I might let that go a bit more, and rack these all at the same time after Labor Day.
And that's pretty much the last that this blog will get updated until then. I have no more wines planned until late October/November and sometime in December, and MAYBE February. I hope to have at least one of these bottled by then, so I don't have to keep buying more airlocks and bottles.
Whew... this is fun but I'm getting impatient! The blackberry has darkened considerably as the yeast keep falling out. It no longer looks magenta, but is approaching what most red wines look like. Maybe a little lighter. I hope it'll get that nice dark look after all is said and done!
Thursday, July 25, 2013
When in Rome....
I am not originally from Georgia. I grew up in Texas, and moved for graduate school. I've only lived here for 5 years, so I am so not a "Georgia Peach."
But man I love me some peaches.
I also hate the peaches song. You listen to that 10 times in one day while at a job and see if you like it after that. Also, the bicycle song. Both will send me running for the hills.
I first tasted peach wine my first year here in Georgia. It was Taste of Athens, and a new winery nearby had a booth. If you live in the area, Boutier Winery is an amazing place, and the owners are simply awesome. Anyways, their peach wine was the first wine I'd ever had that I actually liked. This might come as a surprise, but for nearly my whole life before this, I absolutely hated wine. Could not stand it. Much preferred screwdrivers if I were to have any alcohol. I know now this is because my father, when he does drink wine, prefers the dry reds that most men (it seems) like. And my mother, to try and appeal to his taste as well as others, tended to get the dryer whites.
I canot stand dry wine. It just tastes like bad fruit juice, but without the nice fruit flavors.
This is my personal taste, and by no means a judgement. Just want to put that out there. I also like boiled hotdogs, which is apparently is a crime against nature. Also, I hate tuna in all forms. Yes, even a perfectly seared-on-the-outside-rare-on-the-inside tuna steak. So take my likes and dislikes with a grain of salt.
Anyways, I grew up with wine that was not to my liking, and had never had a sweeter wine, until that day. And I was hooked. I even bought Boutier's magnum of peach wine at one point because I loved it so much. Naturally, when I thought about getting in to making wine myself, a peach wine was one of my top ideas.
Originally, I was going to do a fig wine next, as figs are coming in to season and will be far cheaper than they would be normally. But the boyfriend and I were at the grocery store last weekend and peaches were $0.64/lb. That is insanely cheap for peaches. And yes, I know, I'm in Georgia.
Did you know that South Carolina actually produces more peaches than Georgia? It's true.
I quickly looked up some peach wine recipes on Jack Keller's site to see how much I would need. According to all three of his recipes, to do a 3 gallon batch, I would need 9 lbs of peaches. Totally doable at that price! I decided I was very intruiged by that peach banana wine, so that's what I decided to try next.
Also, I'm trying to stay away from anything grape or grape related, just because I want to experiment and see what kinds of wines I can make from other fruits. And his description of a "superb golden wine" hooked me.
So.. 9lbs of peaches and 3lbs of bananas for around $8 later, it's time to start!
If you've ever had to peel a peach, it can be rough, especially if you get the really really really ripe (in other words, mushy) peaches. Luckily, I didn't have to peel them, but I did have to destone and slice. Which can be a hassle if you don't know how to do it.
Firstly, don't get mushy peaches. I know when you get them in a can, they're all mushy and sweet and lovely, but a mushy peach is a bad peach when you get them fresh. Get ones that are firm, but not rock hard. They give a little bit when squeezed but don't, well, mush.
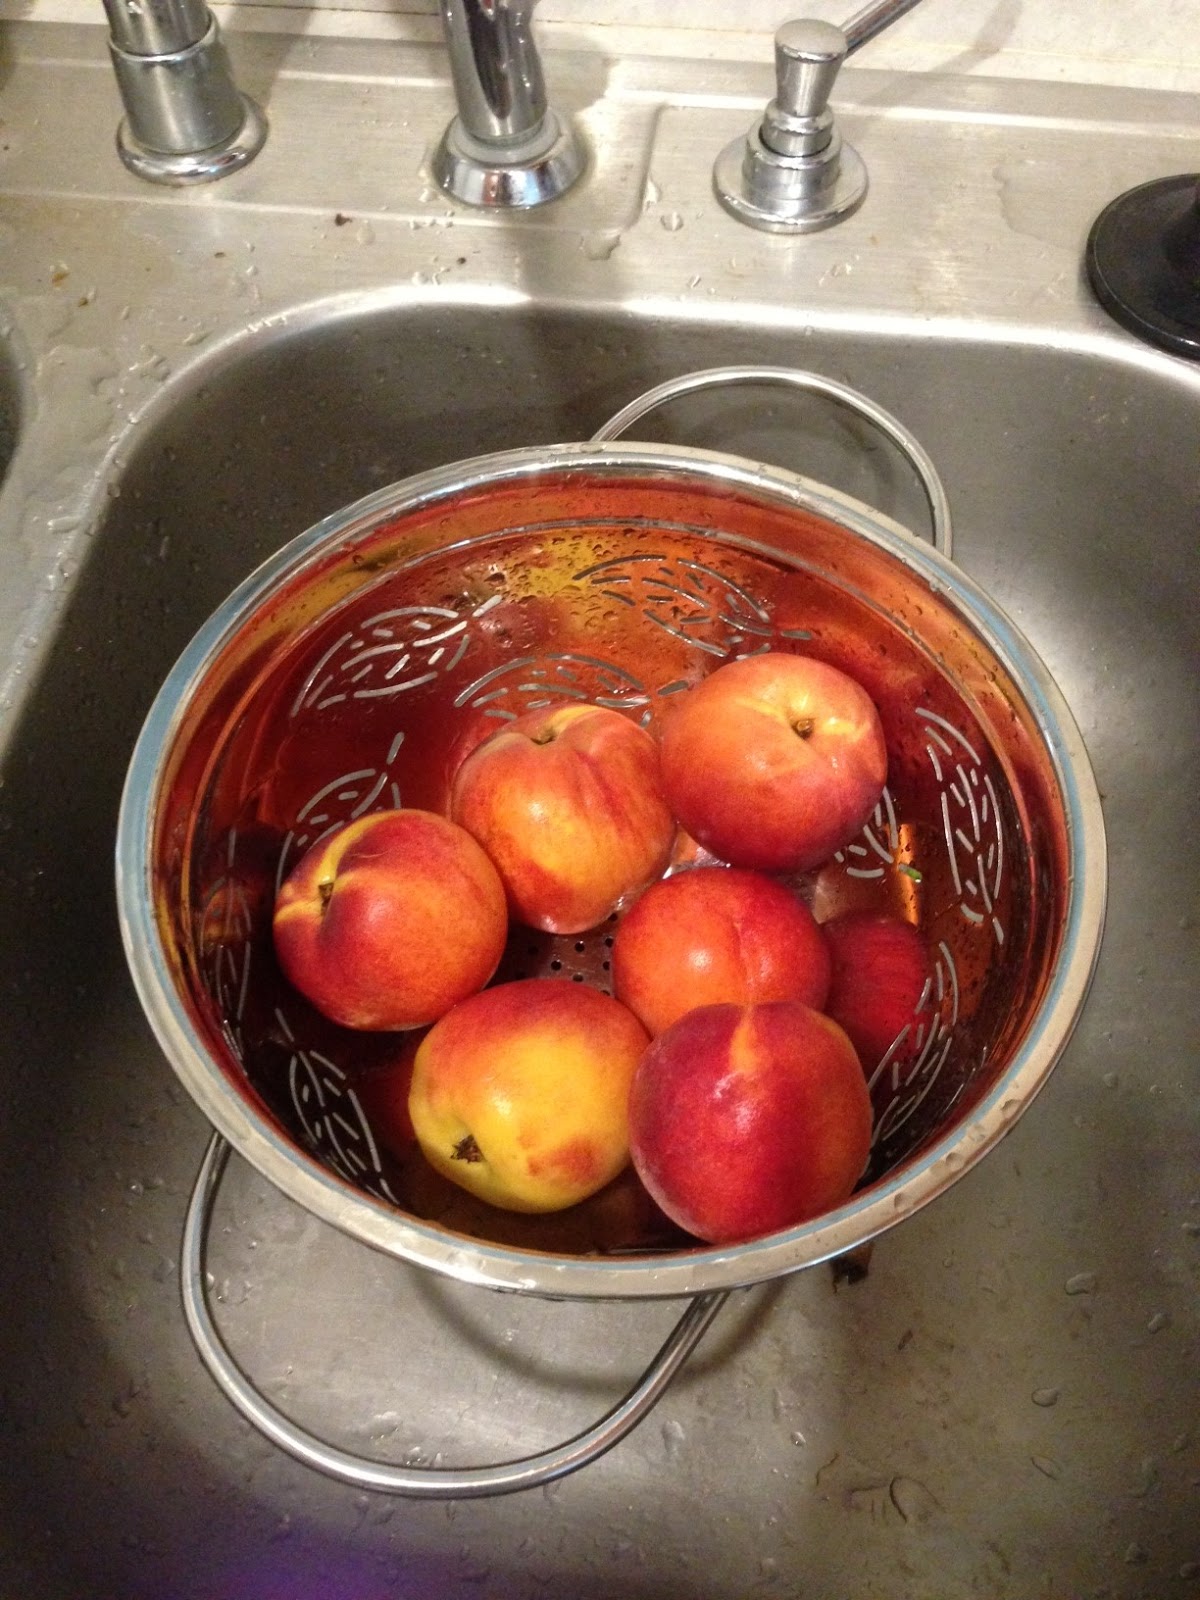
Washed well, they looked delicious enough to eat right then and there.
 Note: This is not all of the peaches. I sliced, in total, 27 of them. My hand hurt afterwards.
The next step is to get it open without completely destroying it. To do that, take your knife and cut in a circle all around it. The stone will keep you from going completely through. In essence, you're cutting it in half, with only the stone keeping it together
 Take one half in either hand, and twist.
 Then just pull apart!
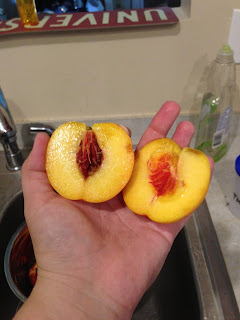 And there you have two peach halves!
To get the stone out of the other half, you can either get a spoon to dig it out, if you want just peach halves, or you can repeat the process with just that half to get a quarter.
 From there, you can grasp the stone itself and work it out.
The peaches need to be sliced as thin as you can make them, but peaches aren't as firm as apples or pears, so the slices won't be paper thin. Just as thin as you can get them. I had to stop to work out a cramped hand before I could get all 9lbs done.
 They look a bit like apples though.
The recipe also calls for bananas t be used, but not as a whole banana. It wants the juice and sugar of the banana, but not the starchyness of the banana itself. So they were boiled. 1lb of peeled, sliced bananas in 1 pt of water. (So 3lbs in 3 pts).
 Did you know that bananas swell up when you boil them? I didn't. Made a bit of a mess in my kitchen.
While everything was getting hot and boiling, I added half the sugar needed (again, according to the recipe.) 2lbs 10oz of sugar. My boyfriend was watching with wide eyes, as he hadn't seen me put the 7 1/2 lbs in the blackberry wine. A repeated comment was "Thats....... a lot of sugar." Well yes, but it's not to make it sweet. It's food for yeast!
 Sugar is in. Bananas are draining. Time to get those peaches steeping in boiling water! I poured 12 pints of boiling water over the sugar and peaches, and stirred gently (so as not to tangle my nylon bag) to get the sugar dissolved.
I then left it to cool overnight, as I had to go to work in the morning and couldn't wait up to do the next part.
At approximately 6am this morning, I came downstairs, made sure the peach/sugar/water mixture was cooled, and then poured in my approx 3 pints of banana water, and enough water to make up to 3 gallons. I estimated I didn't really lose that much in the boiling of the bananas and so added 9 pints. (12 over the peaches + 3 with the bananas + 9 more = 24 = 3 gallons). I also added two things I haven't used before.
1) Citric acid:
 Citric acid gives a wine a "fresh" flavor due to the acidity. Peaches and bananas aren't all that acidic when compared to grapes or blackberries, so an additive is needed. I added 1 1/2 tsp.
2) Campden tablets


Campden Tablets contain potassium metabisulfide, which then disassociates to form sulfur dioxide.
 The sulfur dioxide performs two tasks. Firstly, it kills off any wild yeast that happens to be in the mix. Secondly, it kills bacteria, which would normally thrive with the extra citric acid, and thus contaminate my wine. I put three tablets (1 tablet per gallon), as well as the citric acid into a plastic bag and crushed the tablets with a rolling pin. I love my boyfriend's marble rolling pin. I love it even more since he moved in with me between me buying it for him for Christmas and him moving in. It was like giving myself a new kitchen toy. (I didn't know he'd be moving in when I bought it. It just worked out that way, honest!)
After adding my banana water, more water, citric acid, and campden tablets, I stirred the must, re-covered it, and then went off to work.
12 hours later, I was home, napped, and a bit more relaxed. I then added some pectic enzyme, like I did for the blackberry. Again stirred up and re-covered. You will notice the difference with this wine is that I still haven't removed the solids yet. The peaches are actually going to stay in there for the whole of the primary fermentation, and only removed and strained when the wine goes into the secondary and goes under an airlock.
Tomorrow morning around 7am I will add the yeast nutrient and the yeast itself. Excitement!
And in blackberry news, I was getting concerned as it looked like my overflow container was getting almost brown to black. This is Not Good as that means oxidation has happened and the wine is unstable, or possibly even turning to vinegar. I discussed the issue with my wine co-worker who had never had the problem. I promised to send a picture when I got home.
Well, apparently my eyes are horrible, and my pantry is darker than it looks, because when I got it out on the table and under normal light, it looked just fine. Better than fine, actually, as it was already noticably clearer than before, and the dead yeast were definitely starting to pile up on the bottom.
 Less than a week since it's been under the airlock, and you can see a difference. It looks like the darkening isn't because of any oxidation, but because the yeast are floating down to the bottom, and they were the ones making it that bright pink color. You can see them on the bottom. They're the lighter pink.
So joy! The wine is not ruined. As far as I know. When I rack it the first time I'll take a taste. Hopefully I won't taste acetic acid.
Until next time!
But man I love me some peaches.
I also hate the peaches song. You listen to that 10 times in one day while at a job and see if you like it after that. Also, the bicycle song. Both will send me running for the hills.
I first tasted peach wine my first year here in Georgia. It was Taste of Athens, and a new winery nearby had a booth. If you live in the area, Boutier Winery is an amazing place, and the owners are simply awesome. Anyways, their peach wine was the first wine I'd ever had that I actually liked. This might come as a surprise, but for nearly my whole life before this, I absolutely hated wine. Could not stand it. Much preferred screwdrivers if I were to have any alcohol. I know now this is because my father, when he does drink wine, prefers the dry reds that most men (it seems) like. And my mother, to try and appeal to his taste as well as others, tended to get the dryer whites.
I canot stand dry wine. It just tastes like bad fruit juice, but without the nice fruit flavors.
This is my personal taste, and by no means a judgement. Just want to put that out there. I also like boiled hotdogs, which is apparently is a crime against nature. Also, I hate tuna in all forms. Yes, even a perfectly seared-on-the-outside-rare-on-the-inside tuna steak. So take my likes and dislikes with a grain of salt.
Anyways, I grew up with wine that was not to my liking, and had never had a sweeter wine, until that day. And I was hooked. I even bought Boutier's magnum of peach wine at one point because I loved it so much. Naturally, when I thought about getting in to making wine myself, a peach wine was one of my top ideas.
Originally, I was going to do a fig wine next, as figs are coming in to season and will be far cheaper than they would be normally. But the boyfriend and I were at the grocery store last weekend and peaches were $0.64/lb. That is insanely cheap for peaches. And yes, I know, I'm in Georgia.
Did you know that South Carolina actually produces more peaches than Georgia? It's true.
I quickly looked up some peach wine recipes on Jack Keller's site to see how much I would need. According to all three of his recipes, to do a 3 gallon batch, I would need 9 lbs of peaches. Totally doable at that price! I decided I was very intruiged by that peach banana wine, so that's what I decided to try next.
Also, I'm trying to stay away from anything grape or grape related, just because I want to experiment and see what kinds of wines I can make from other fruits. And his description of a "superb golden wine" hooked me.
So.. 9lbs of peaches and 3lbs of bananas for around $8 later, it's time to start!
If you've ever had to peel a peach, it can be rough, especially if you get the really really really ripe (in other words, mushy) peaches. Luckily, I didn't have to peel them, but I did have to destone and slice. Which can be a hassle if you don't know how to do it.
Firstly, don't get mushy peaches. I know when you get them in a can, they're all mushy and sweet and lovely, but a mushy peach is a bad peach when you get them fresh. Get ones that are firm, but not rock hard. They give a little bit when squeezed but don't, well, mush.
Washed well, they looked delicious enough to eat right then and there.
The next step is to get it open without completely destroying it. To do that, take your knife and cut in a circle all around it. The stone will keep you from going completely through. In essence, you're cutting it in half, with only the stone keeping it together


To get the stone out of the other half, you can either get a spoon to dig it out, if you want just peach halves, or you can repeat the process with just that half to get a quarter.

The peaches need to be sliced as thin as you can make them, but peaches aren't as firm as apples or pears, so the slices won't be paper thin. Just as thin as you can get them. I had to stop to work out a cramped hand before I could get all 9lbs done.

The recipe also calls for bananas t be used, but not as a whole banana. It wants the juice and sugar of the banana, but not the starchyness of the banana itself. So they were boiled. 1lb of peeled, sliced bananas in 1 pt of water. (So 3lbs in 3 pts).

While everything was getting hot and boiling, I added half the sugar needed (again, according to the recipe.) 2lbs 10oz of sugar. My boyfriend was watching with wide eyes, as he hadn't seen me put the 7 1/2 lbs in the blackberry wine. A repeated comment was "Thats....... a lot of sugar." Well yes, but it's not to make it sweet. It's food for yeast!

I then left it to cool overnight, as I had to go to work in the morning and couldn't wait up to do the next part.
At approximately 6am this morning, I came downstairs, made sure the peach/sugar/water mixture was cooled, and then poured in my approx 3 pints of banana water, and enough water to make up to 3 gallons. I estimated I didn't really lose that much in the boiling of the bananas and so added 9 pints. (12 over the peaches + 3 with the bananas + 9 more = 24 = 3 gallons). I also added two things I haven't used before.
1) Citric acid:

2) Campden tablets


Campden Tablets contain potassium metabisulfide, which then disassociates to form sulfur dioxide.

After adding my banana water, more water, citric acid, and campden tablets, I stirred the must, re-covered it, and then went off to work.
12 hours later, I was home, napped, and a bit more relaxed. I then added some pectic enzyme, like I did for the blackberry. Again stirred up and re-covered. You will notice the difference with this wine is that I still haven't removed the solids yet. The peaches are actually going to stay in there for the whole of the primary fermentation, and only removed and strained when the wine goes into the secondary and goes under an airlock.
Tomorrow morning around 7am I will add the yeast nutrient and the yeast itself. Excitement!
And in blackberry news, I was getting concerned as it looked like my overflow container was getting almost brown to black. This is Not Good as that means oxidation has happened and the wine is unstable, or possibly even turning to vinegar. I discussed the issue with my wine co-worker who had never had the problem. I promised to send a picture when I got home.
Well, apparently my eyes are horrible, and my pantry is darker than it looks, because when I got it out on the table and under normal light, it looked just fine. Better than fine, actually, as it was already noticably clearer than before, and the dead yeast were definitely starting to pile up on the bottom.

So joy! The wine is not ruined. As far as I know. When I rack it the first time I'll take a taste. Hopefully I won't taste acetic acid.
Until next time!
Saturday, July 20, 2013
And now... the waiting game...
Something I hadn't been doing all along was checking the specific gravity of my primary, which is a big mistake. Not in the "I have to throw it out now" category but in the "I don't know how much alcohol is in here and if there's enough sugar to make what I want" category. Oops...
I started checking two days ago, and it was at 1.040, which makes sense. The SG is measured relative to water. 1.000 is water. Above is something denser than water (say, water with sugar in it). Below is something less dense than water (say.. alcohol). Most wines start with a SG of around 1.096-1.100 depending on how much residual sugar you want. Want a sweeter wine but don't want to sacrifice your alcohol amount? Start with more alcohol and then the yeast won't consume all of it by the time they die off from alcohol poisoning. Luckily Jack Keller seems to prefer dryer wines and following his recipe has led me down a good path.
Yesterday, my SG was 1.020. I was surprised as you typically rack into the secondary at 1.010, it was getting close with two days left! This afternoon, I checked and it was about 1.005. Time to get it out of that bucket and under an airlock!
This, itself, is an interesting process because you want to keep your wine from contacting oxygen as much as possible. Oxidation leads to vinegar, and that's bad. So instead of pouring and hoping, I used my racking siphon and put the hose way at the bottom of the container. My siphon is a wonderful tool suggested to me by my wine enthusiast co-worker that makes siphoning FAR easier, with less sucking on a tube and getting stuff in your mouth.
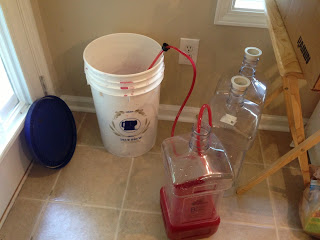 Here you see the whole setup. It kinda looks like a blood transfusion.
 Holding the siphon. You can't see the whole thing, but the intake is about 1 inch from the bottom of the wand. This is so when I rack, I won't have to be careful to not get any of the lees in with the wine. I use this by pumping the top a few times and it gets the suction and the siphoning going.
 You see my hose is all the way at the bottom of the container to be filled, in order to minimize the wine's encounter with oxygen.
I filled this container to the narrowest point, again, to avoid as much surface area contact with oxygen. It looks really pretty, I think.
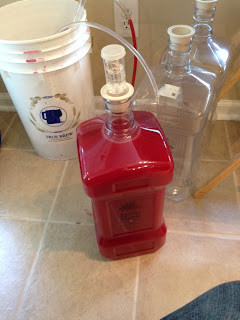 The airlock is on top. It's filled with water and will let the carbon dioxide out, but not allow any oxygen in, thus keeping things truely anaerobic. I truely didn't expect it to be such a vibrant pink, however. And it is cloudy, yes (a friend commented that it looked like an alcoholic smoothie). There's still billions of yeast in there doing their yeasty thing, so it'll be cloudy until the yeast die and float to the bottom.
Another thing when it comes to red wines. Light is bad. It won't affect the taste of the wine, but it will affect the color. I had planned to store these in my pantry anyways, but that does get opened frequently, so I wanted to protect things as much as possible. Enter a shirt I didn't care for!
 Doesn't cover it all, but covers most of it.
 The wine's home for the next who knows how many months.
Now, I knew I'd have more than 3 gallons. The recipe called for 21 pints of water, which is only 3 pints less than 3 gallons, and I KNOW I had more than 3 pints of juice after doing all the mushing and extraction. I decided to use one of my other bottles for the overflow. I will use this to top up my main one every time I rack, so as not to dilute things with water. Luckily, I'd planned on doing another batch relatively soon, so I had a second airlock.

 Ignore the messy pantry.
You can see I had probably about a gallon extra, so that will make for some decent topping up supply, and maybe even an extra bottle or two when all is said and done.
As of now, both airlocks are bubbling away, telling me fermentation is still going on, and eventually both will fill with carbon dioxide instead of air, so even the extra one will be away from the bad oxygen.
We did taste some. Definitely not to my taste as I really don't like dry reds, but my boyfriend absolutely loved it. Which is good because he's the reason I'm making this one first. I wanted a nice robust dry red for him. So far, so good!
So, this is the last I'll post about the blackberry for at least a month. After that, I'll rack it for the first time and see how things are proceeding.
Next up.... either a fig or a peach banana wine!
I started checking two days ago, and it was at 1.040, which makes sense. The SG is measured relative to water. 1.000 is water. Above is something denser than water (say, water with sugar in it). Below is something less dense than water (say.. alcohol). Most wines start with a SG of around 1.096-1.100 depending on how much residual sugar you want. Want a sweeter wine but don't want to sacrifice your alcohol amount? Start with more alcohol and then the yeast won't consume all of it by the time they die off from alcohol poisoning. Luckily Jack Keller seems to prefer dryer wines and following his recipe has led me down a good path.
Yesterday, my SG was 1.020. I was surprised as you typically rack into the secondary at 1.010, it was getting close with two days left! This afternoon, I checked and it was about 1.005. Time to get it out of that bucket and under an airlock!
This, itself, is an interesting process because you want to keep your wine from contacting oxygen as much as possible. Oxidation leads to vinegar, and that's bad. So instead of pouring and hoping, I used my racking siphon and put the hose way at the bottom of the container. My siphon is a wonderful tool suggested to me by my wine enthusiast co-worker that makes siphoning FAR easier, with less sucking on a tube and getting stuff in your mouth.


I filled this container to the narrowest point, again, to avoid as much surface area contact with oxygen. It looks really pretty, I think.

Another thing when it comes to red wines. Light is bad. It won't affect the taste of the wine, but it will affect the color. I had planned to store these in my pantry anyways, but that does get opened frequently, so I wanted to protect things as much as possible. Enter a shirt I didn't care for!


Now, I knew I'd have more than 3 gallons. The recipe called for 21 pints of water, which is only 3 pints less than 3 gallons, and I KNOW I had more than 3 pints of juice after doing all the mushing and extraction. I decided to use one of my other bottles for the overflow. I will use this to top up my main one every time I rack, so as not to dilute things with water. Luckily, I'd planned on doing another batch relatively soon, so I had a second airlock.


You can see I had probably about a gallon extra, so that will make for some decent topping up supply, and maybe even an extra bottle or two when all is said and done.
As of now, both airlocks are bubbling away, telling me fermentation is still going on, and eventually both will fill with carbon dioxide instead of air, so even the extra one will be away from the bad oxygen.
We did taste some. Definitely not to my taste as I really don't like dry reds, but my boyfriend absolutely loved it. Which is good because he's the reason I'm making this one first. I wanted a nice robust dry red for him. So far, so good!
So, this is the last I'll post about the blackberry for at least a month. After that, I'll rack it for the first time and see how things are proceeding.
Next up.... either a fig or a peach banana wine!
Subscribe to:
Posts (Atom)